I was so excited when I found out we were still having our work Halloween costume competition this year. As usual, I had a plan. I had already decided last year that I was going solo this year, so learning that there would be no group costumes was no problem for me. I was going rogue and solo and perfectly on brand for me as… a Pin Cushion! For added fun, I decided to also include a measuring tape scarf of sorts.
Step One: Gather Materials
I started by planning out what I would need. I had a solid plan for what I was going to do, so I had a pretty good idea of what I would need.
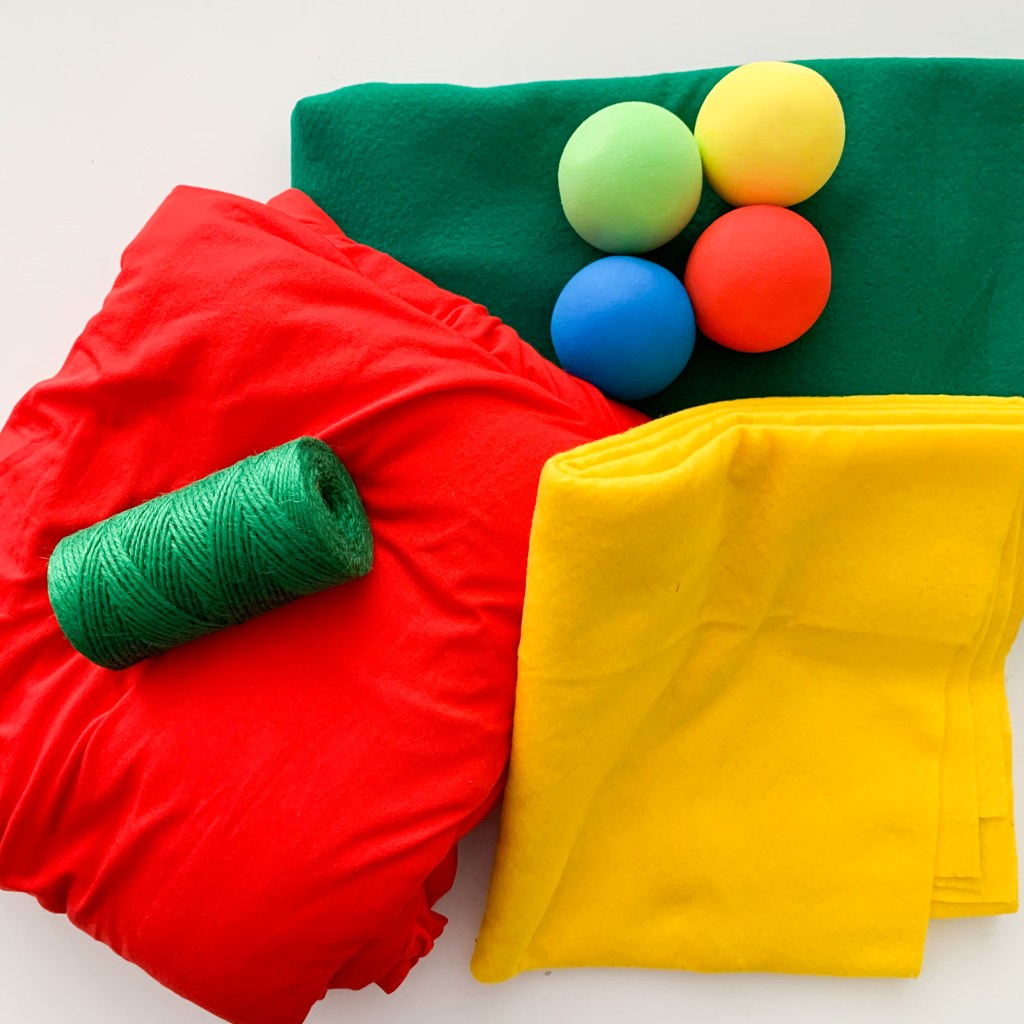
I bought:
- red jersey fabric
- yellow felt
- green felt
- green twine
- metal skewers
- multi-colored foam balls
I also had some leftover craft foam on hand, which is vital to shaping the final product, and used some other odds and ends that I already had in my supplies (glue gun, glue sticks, thread, black fabric paint, etc.).
Step Two: Making the “Pins”
My favorite thing about this costume is the pins! I was so happy with how they came out.

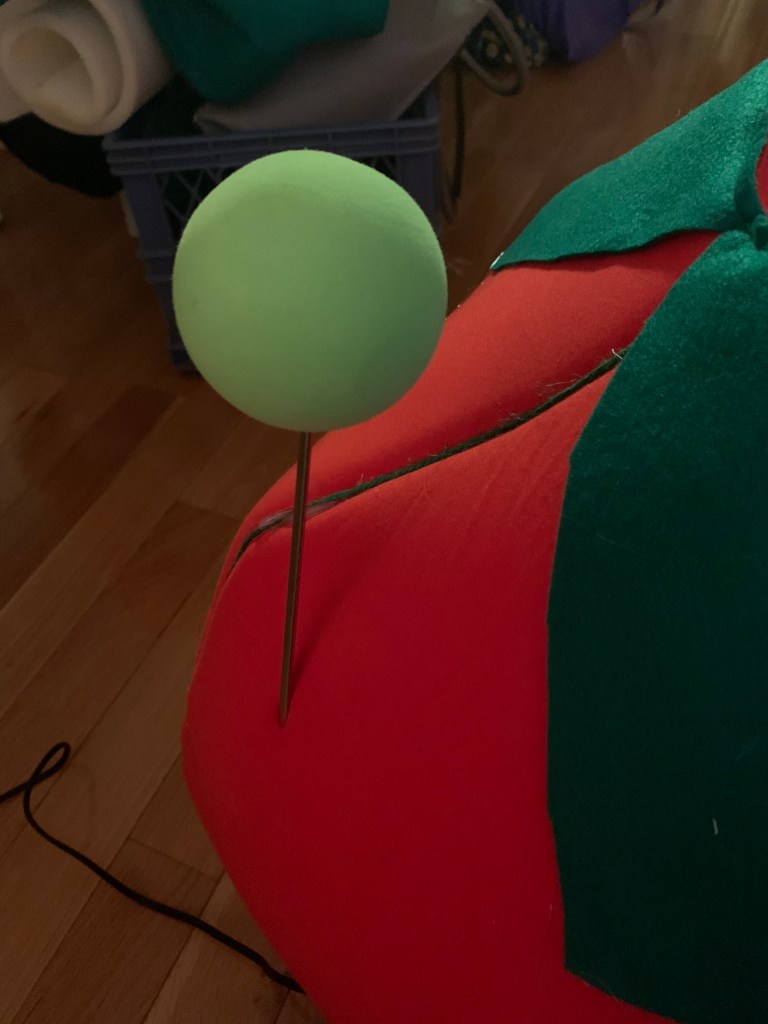
I used the foam balls and the metal skewers to create the look of glass head pins. It worked so much better than I had envisioned in my head (don’t you love when that happens?!).


My initial plan had been to cut a slit into the balls, and then hot glue the skewers in. This turned out to be unnecessary as the round part of the skewer fit perfectly into the knife slit, and held perfectly. Once the round part of the skewer was hidden away, it looked JUST like a giant pin!
Step Three: Making the Pin Cushion
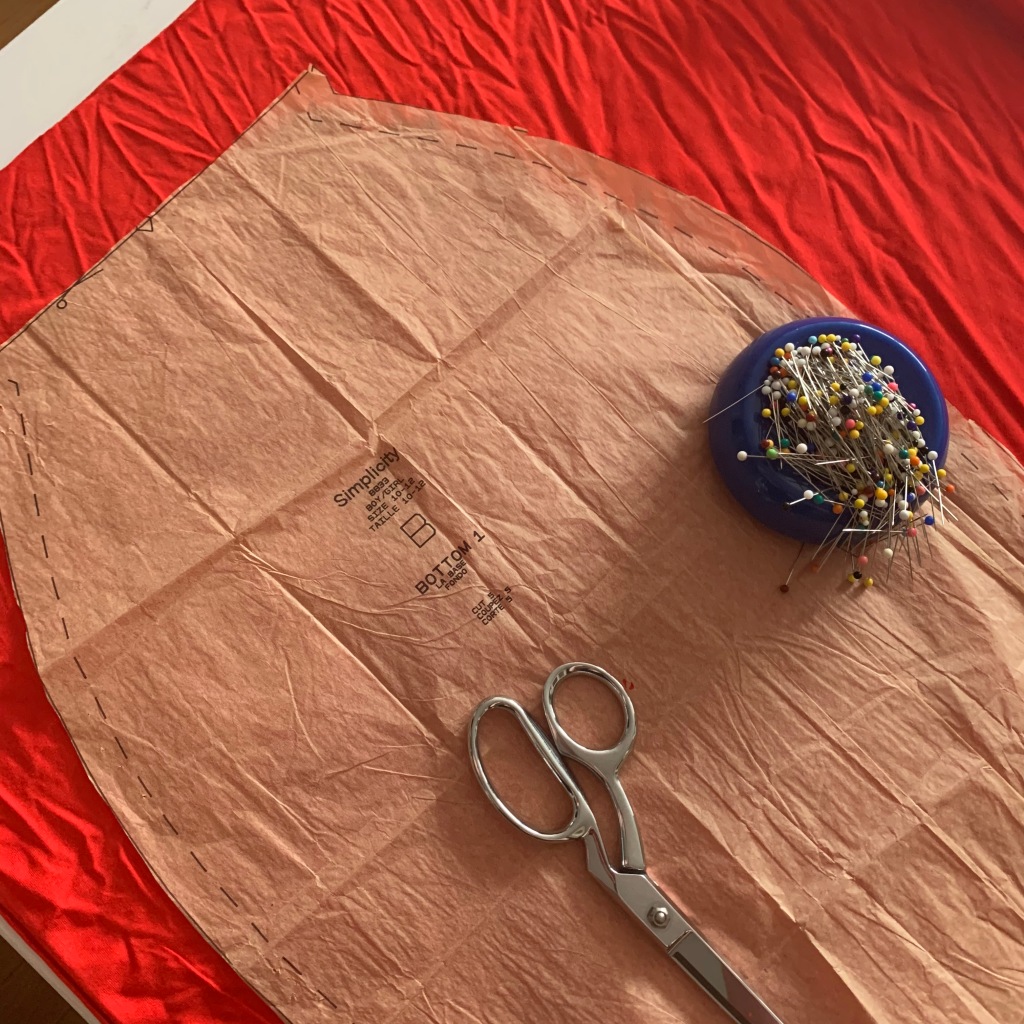
As soon as I had my materials, I also had a pretty good idea of what I would need to do to create the pin cushion shape. And the answer came from a strange source: Olaf from Frozen! I used the same snowman pattern I used to make Olaf’s costume for the show last year. However, I obviously omitted the top snowball piece and just used the bottom, cutting five panels out of both the fabric and the craft foam.
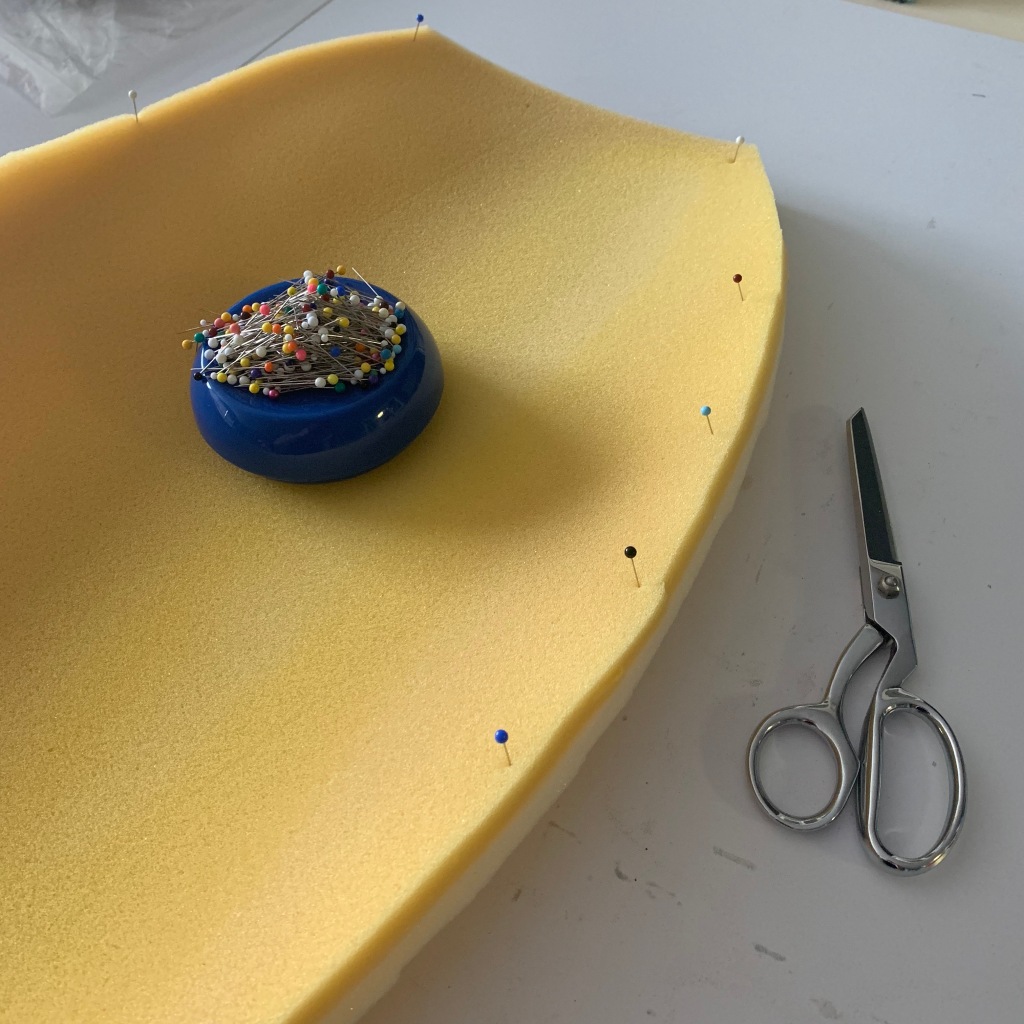

I decided to cover each piece of foam with the fabric before sewing all the pieces together. This was to help create a seam in the center for the green twine to fit, and to create a better “bumpy” look for the cushion.


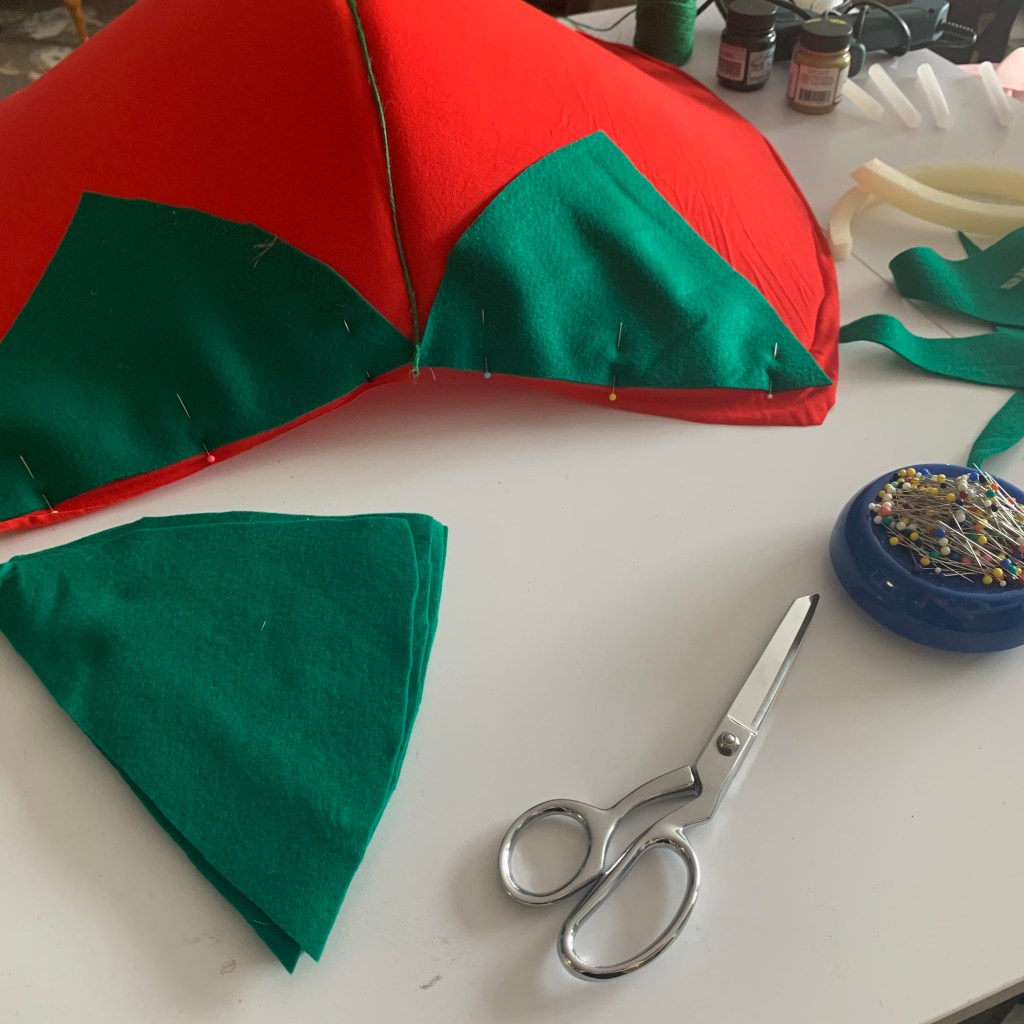
At this point, I cut little triangles out of green felt to adhere to the top of each panel. In these pictures you can also see the placement of the green twine, though at this point it was just pinned on as a test (it would later be hot glued into the seams).

I sewed all five panels together as well as attached the green felt triangles, and then it was time for an initial try on.

It was perfect! Though at this point I realized I would need some sort of way to ensure it stayed closed in the back, as five panels was a little bit too bit (but four would’ve been too small). As I don’t think I took pictures of that process, I ended up making belt loops on the inside and weaving through an extra length of the green felt.
Step Four: Adding the Pins
Now it was time to add the pins to the pin cushion. I was nervous about this part because I was starting to realize that the pins might be too heavy, and wouldn’t stay upright. I decided to test a few first.

It actually worked pretty well. The green pin had to be hot glued in place on the inside to stay up, and the blue one is literally inserted into the craft foam the same way a real pin would be in a pin cushion. I took the fact that these didn’t instantly fall out as a good sign, and continued adding the others.
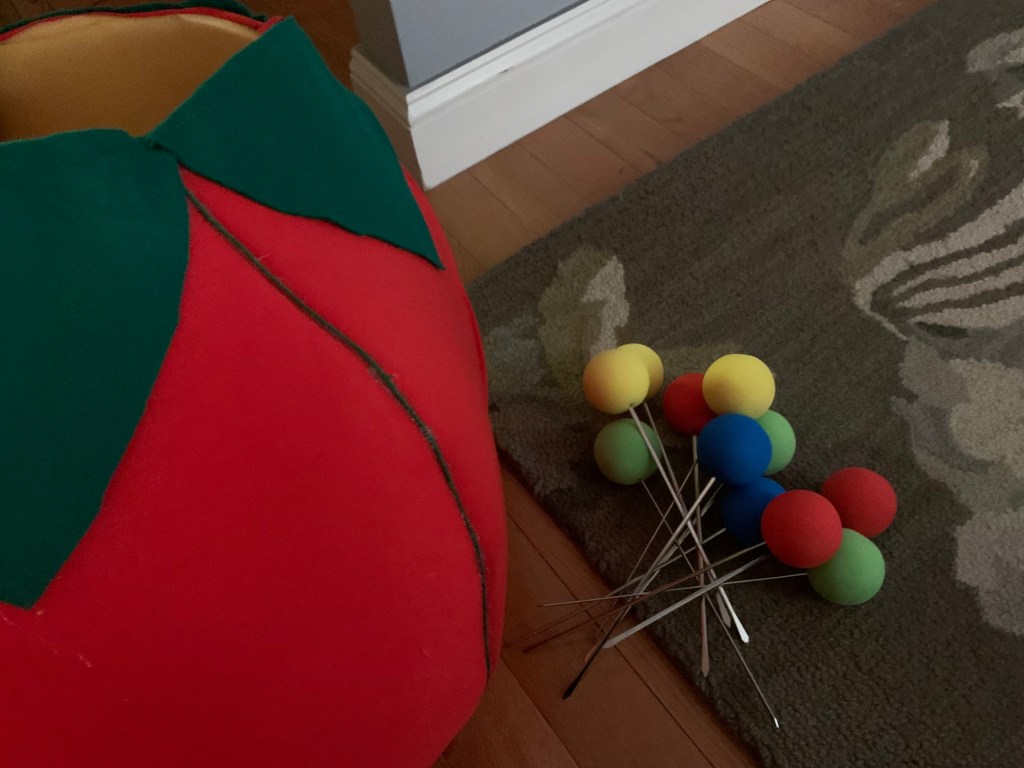
Realized as I was looking for the images for this that I didn’t really take too many pictures during this process. I was trying to concentrate on it, and that often makes photographing the process fall by the wayside. I tried it on again for good measure. I’m saving that picture for the next section of this post, but here’s the full pin cushion with pins sitting on the floor:

Step Five: The Measuring Tape Scarf
I knew I wanted an added element of fun to this costume, so I decided to make a tape measure scarf. The first step was to sew strips of the felt together to make it long enough to look like a decent measuring tape. I sewed three strips together and then topstitched the seams down to give it a slightly smoother look.

Then it was time to paint! This was a fairly time consuming but easy project. The measurements are no where near real measurements (each number is 10 inches apart), but it’s not meant to be a functional measuring tape so who cares!


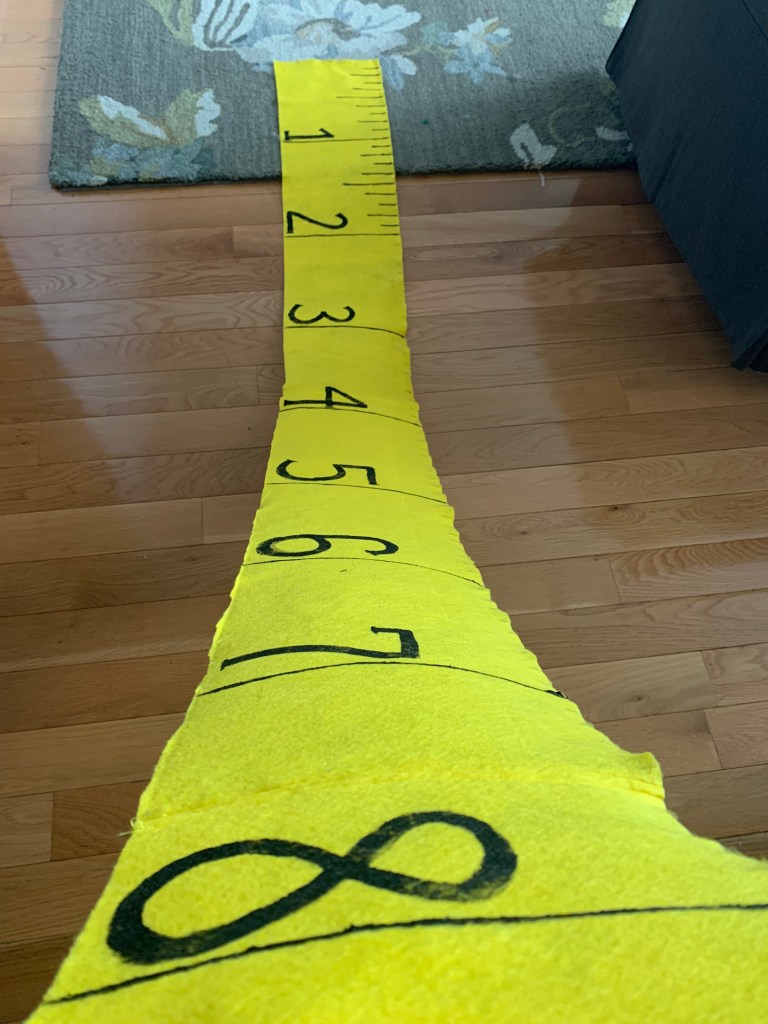
I left it to dry for a little while, and there you have it! At this point, I wasn’t sure how I wanted this to work with the costume, but I was happy to have it.
Step Six: The T-Shirt
When I initially envisioned this costume, I saw it as more of a one piece dress. In the end, I decided this was impractical so I wanted to make a matching t-shirt instead. I used the Forget Me Not Iris Tee pattern and the same fabric as the pin cushion.

I have been wanting to make an Iris Tee since the pattern was released but had yet to get around to it. That’s also why I decided to make it a separate piece, so I could use it post-Halloween as a t-shirt.

I LOVED the pattern! It went together so easily and, though it’s hard to see in this photo (this color was really hard to photograph!), it has such a pretty sleeve pleat detail. I’m looking forward to wearing it minus the costume, and plan to make many, many more. However, as you’ll see later in the post, this shirt was almost completely unnecessary as it gets covered up by the measuring tape scarf!
Step Seven: The Strawberry
At this point, I realized I had forgotten the little strawberry that comes on the pin cushion. Does it have an official name? I suppose I should look it up, as I am an experienced sewist and should know the proper terms, but I kind of like just calling it the strawberry.
I made quick work of it by cutting a triangle of my main fabric and an extra square of the green felt.

I had an old pillow that I was getting rid of, so I used some of the stuffing from it to stuff the strawberry.

I loved the little side-by-side comparison in this photo!
I hot glued the top shut and then glued on the extra green square (forgot to photograph, unfortunately) onto the top. Then, I used extra green twine to create a string coming from the top. I hot glued the other end of the twine to the inside of the pin cushion, and then laid it out over the top.
The costume was complete!
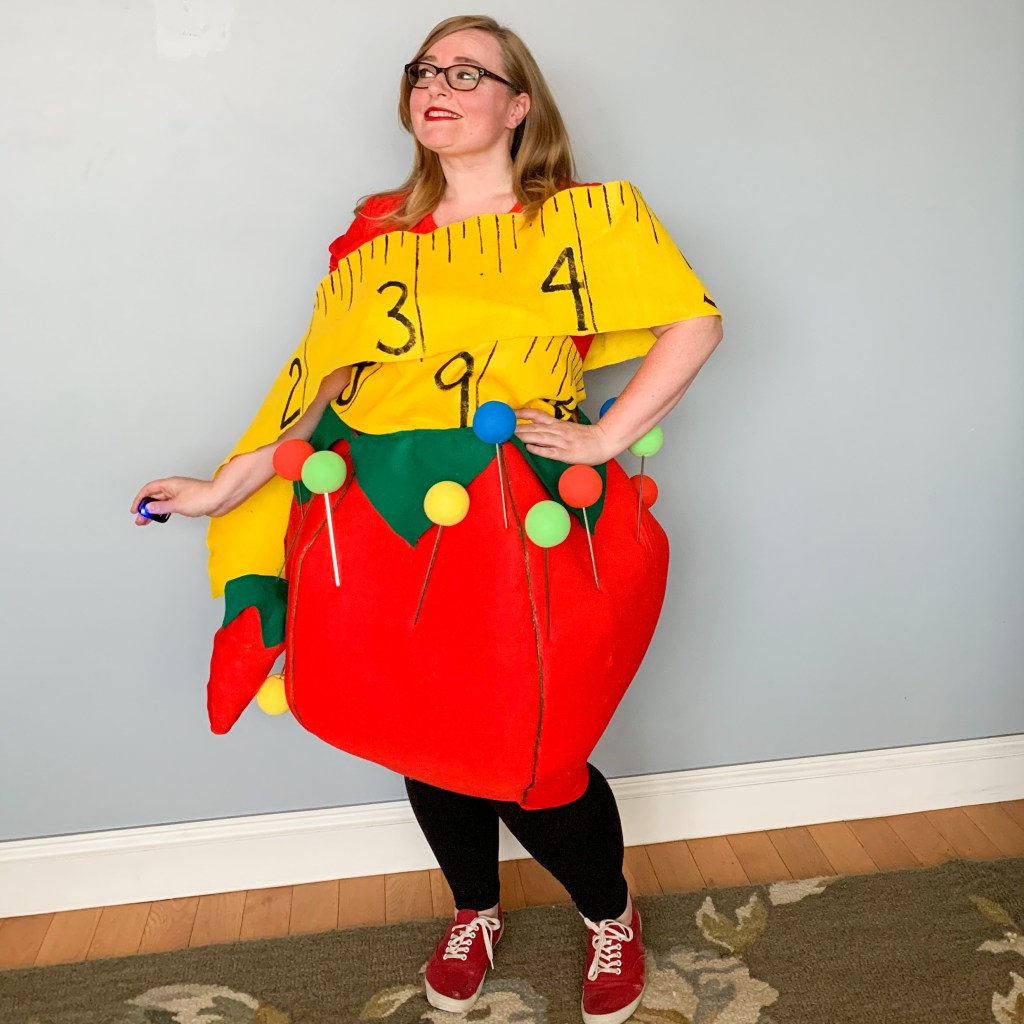
The Final Result
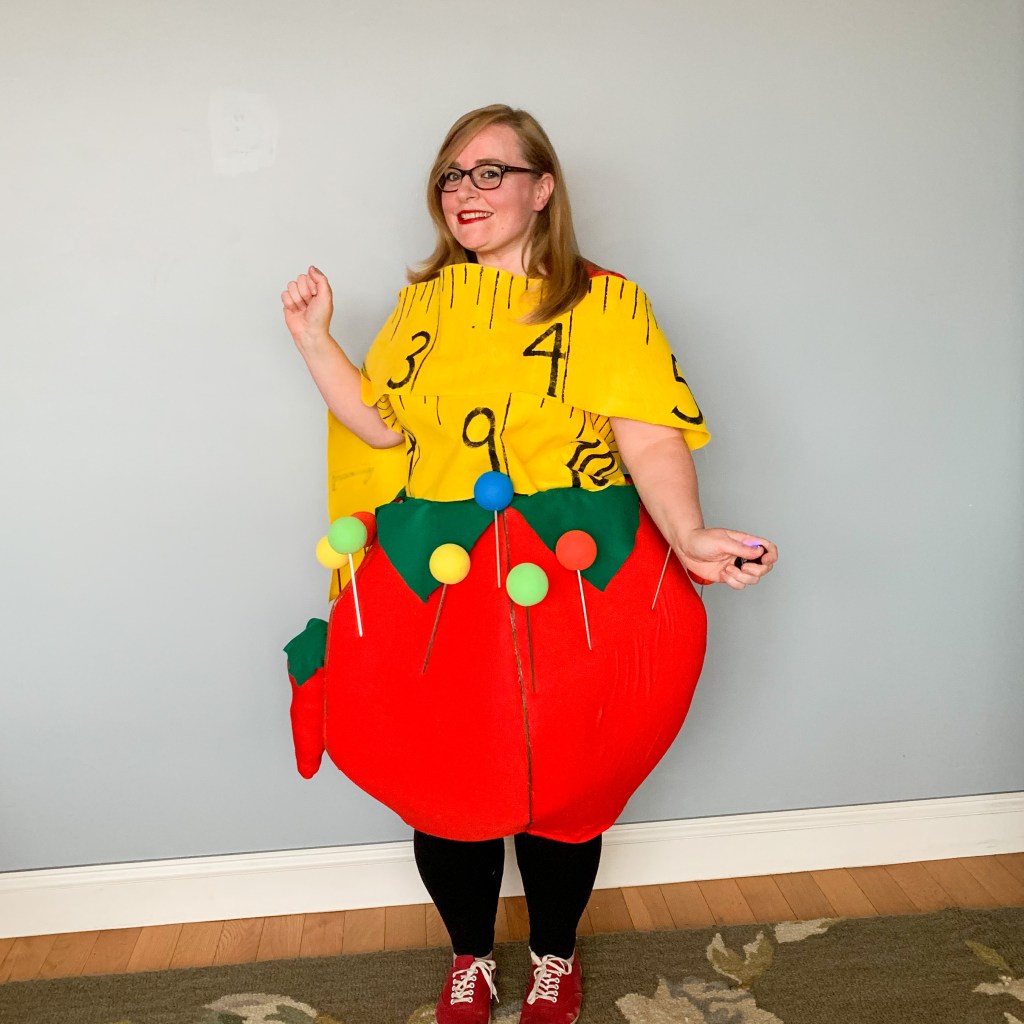
Here’s the final result! I actually took pictures of it at home the day before the contest so I could really style it up (mainly so I could wear red lipstick, which I won’t be able to do for the work pictures cause… masks).
Here’s a total overshare because I loved how it came out so much!


So did it win a prize this year? Well, this is posting before I show off the costume at work today, so you’ll have to check my Instagram grid to find out (@sewfancybrooklyn)!

Pingback: {The 2020 Makes Round Up} |
Can you share the sewing pattern for the tomato?
LikeLike